WhatsApp is a primary channel for many real estate agents. In SimpleListings you can use it two ways: a contact button on each listing page and, if you need it, a full connection that syncs your conversations and enables the AI assistant.
This guide covers both levels, with the step-by-step connection process and reference screenshots you will see in the app.
Two setup levels
Basic · 2 minutes
WhatsApp button on listings
Add your number in profile and enable the button on property pages. Visitors message you directly.
Full · ~5 minutes
WhatsApp Business connection
Link your number with Facebook to sync chats in Messages and, on the Advanced plan, enable the AI agent.
Step 1: WhatsApp button on your listings
If you only want buyers to message you from a property listing page, this is enough:
- Go to Edit profile (sidebar menu or dashboard)
- On the Profile tab, enter your WhatsApp number with country code
- Under On property pages, check Show WhatsApp contact button
- Save your changes
Useful options in the same section:
- Show phone number on listings — if you want the number visible in addition to the button
- Ask for number before opening WhatsApp — capture the visitor's contact info before redirecting to WhatsApp
Step 2: Before connecting WhatsApp Business
For the full connection, have these ready:
- The WhatsApp Business app on your phone, with the number you want to use
- A Facebook account that manages your business
- Your phone nearby to scan the QR code and confirm prompts
- About 5 uninterrupted minutes
Important: you keep using WhatsApp Business on your phone as usual. SimpleListings connects in the background; it does not replace your app.
To start the connection:
- Open Messages in the sidebar, or go to Edit profile → Integrations
- Click Connect WhatsApp with Facebook
- The built-in step-by-step guide opens — keep that tab open while you complete Facebook
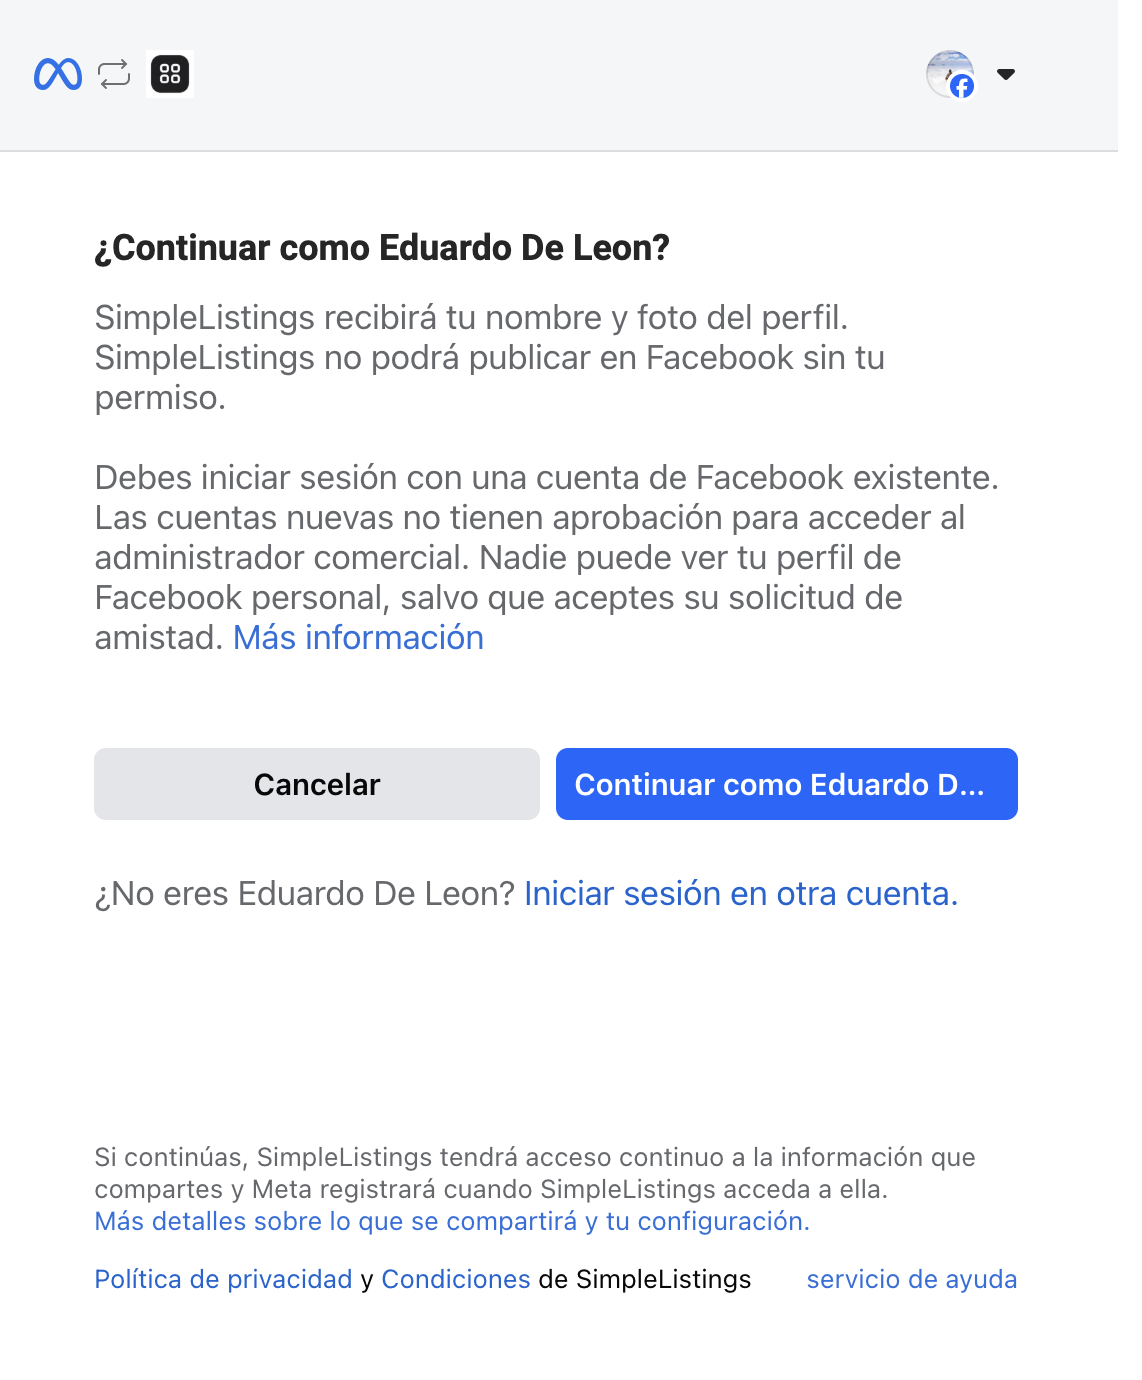
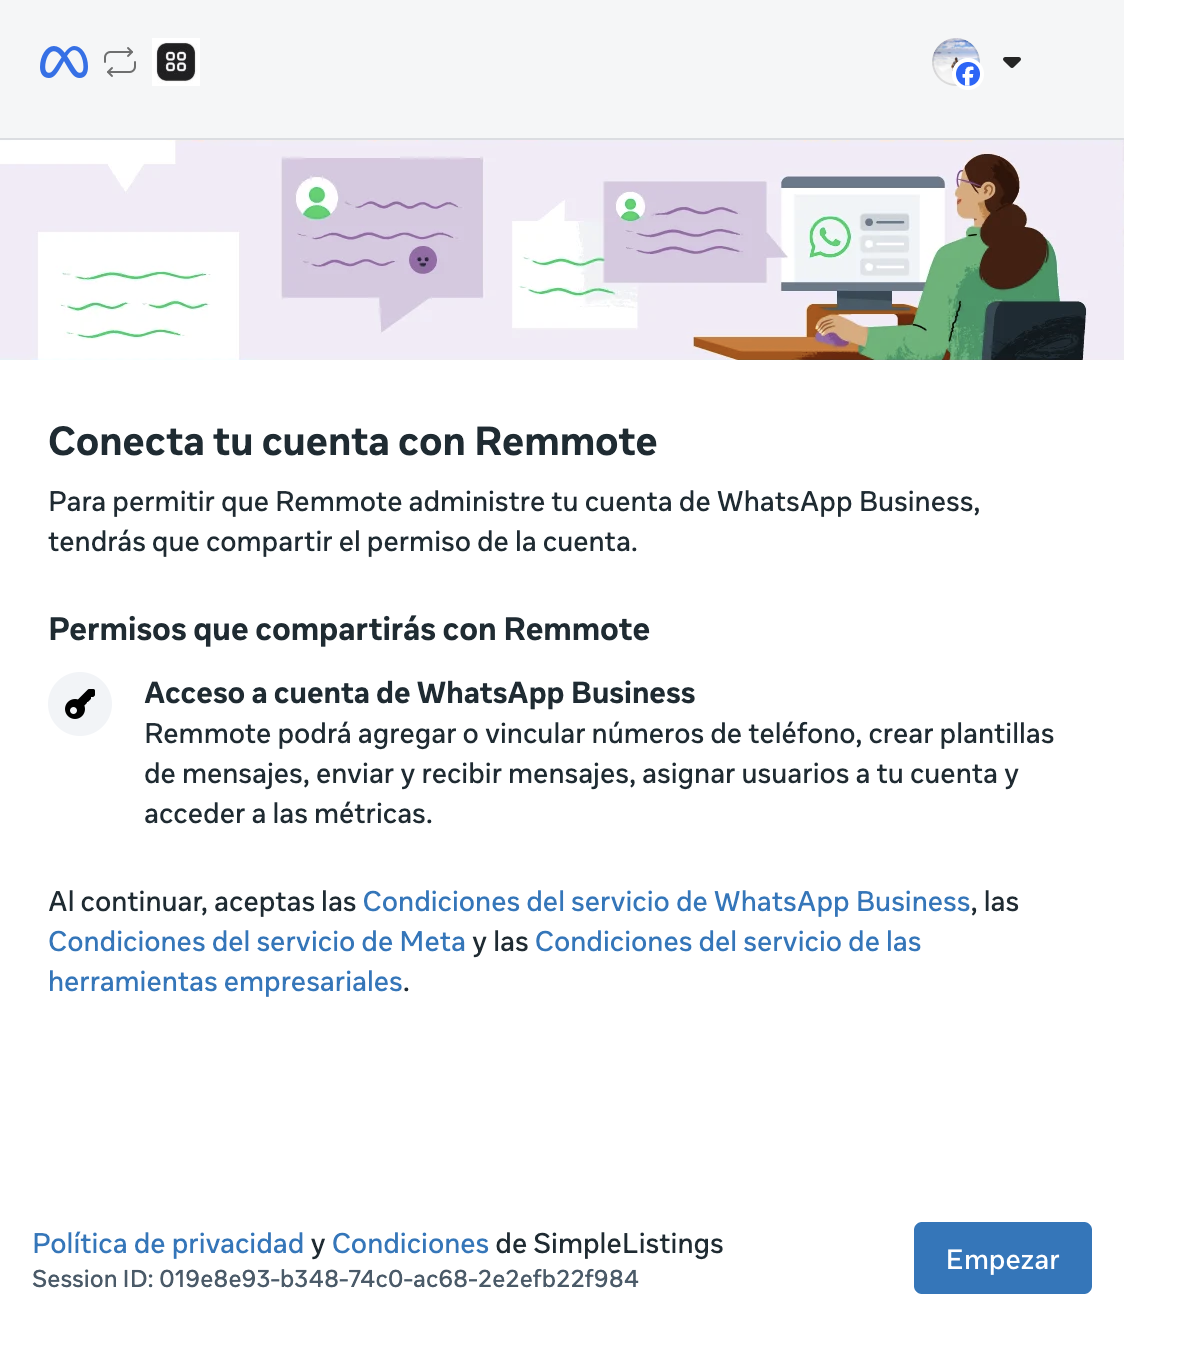
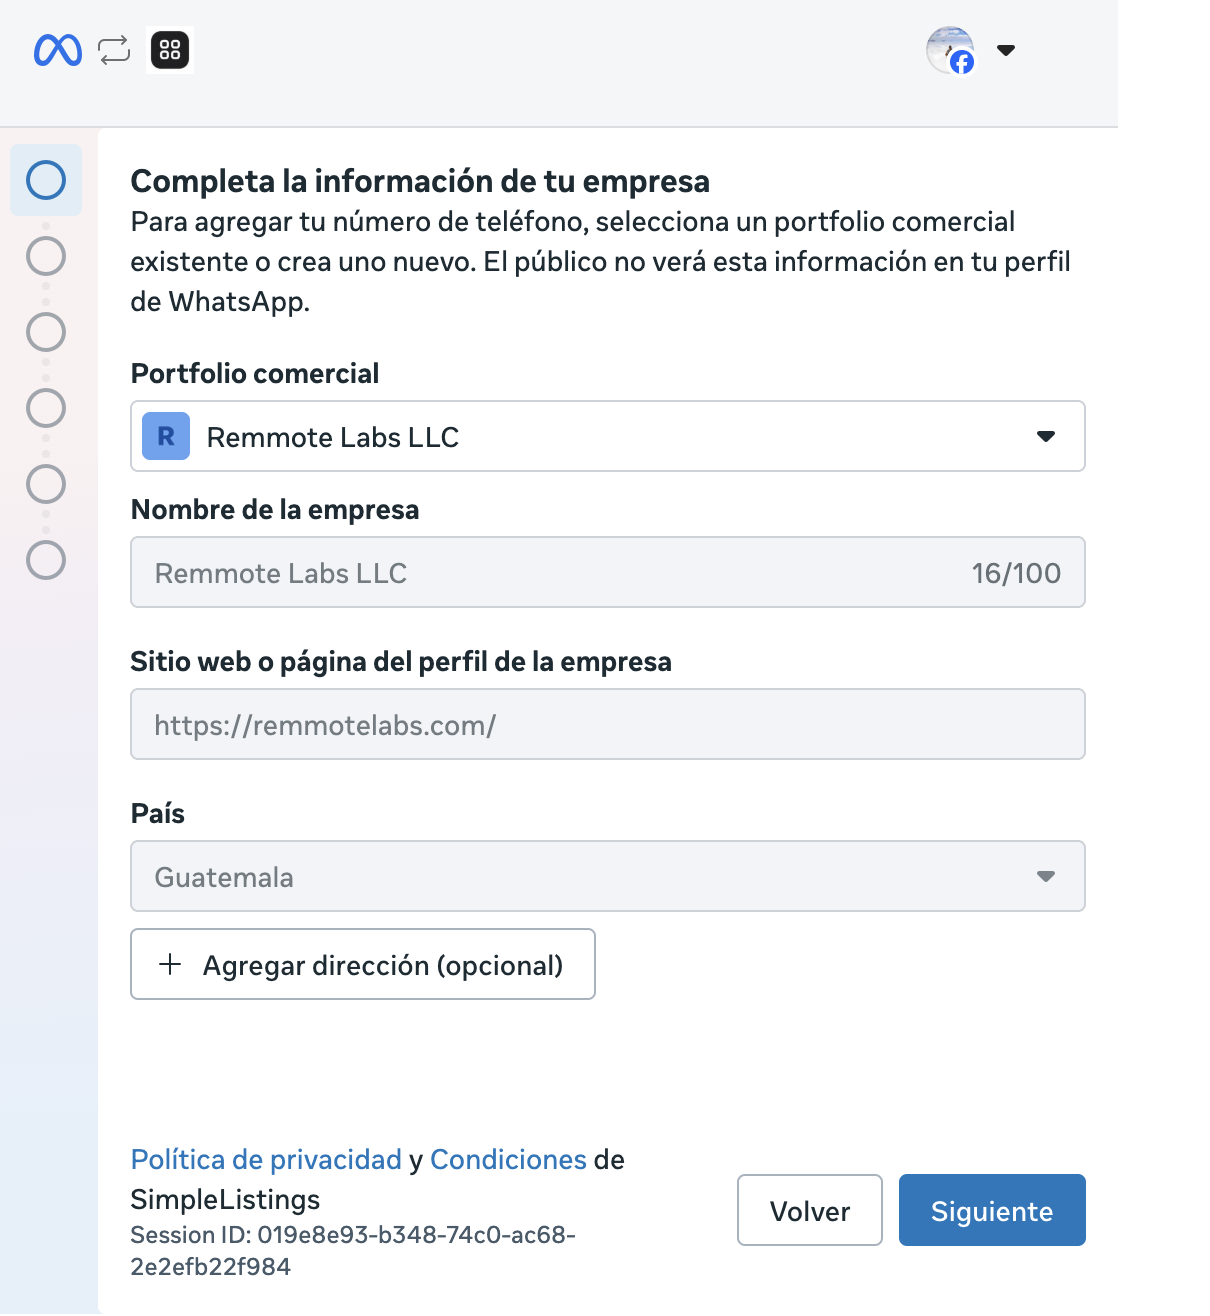
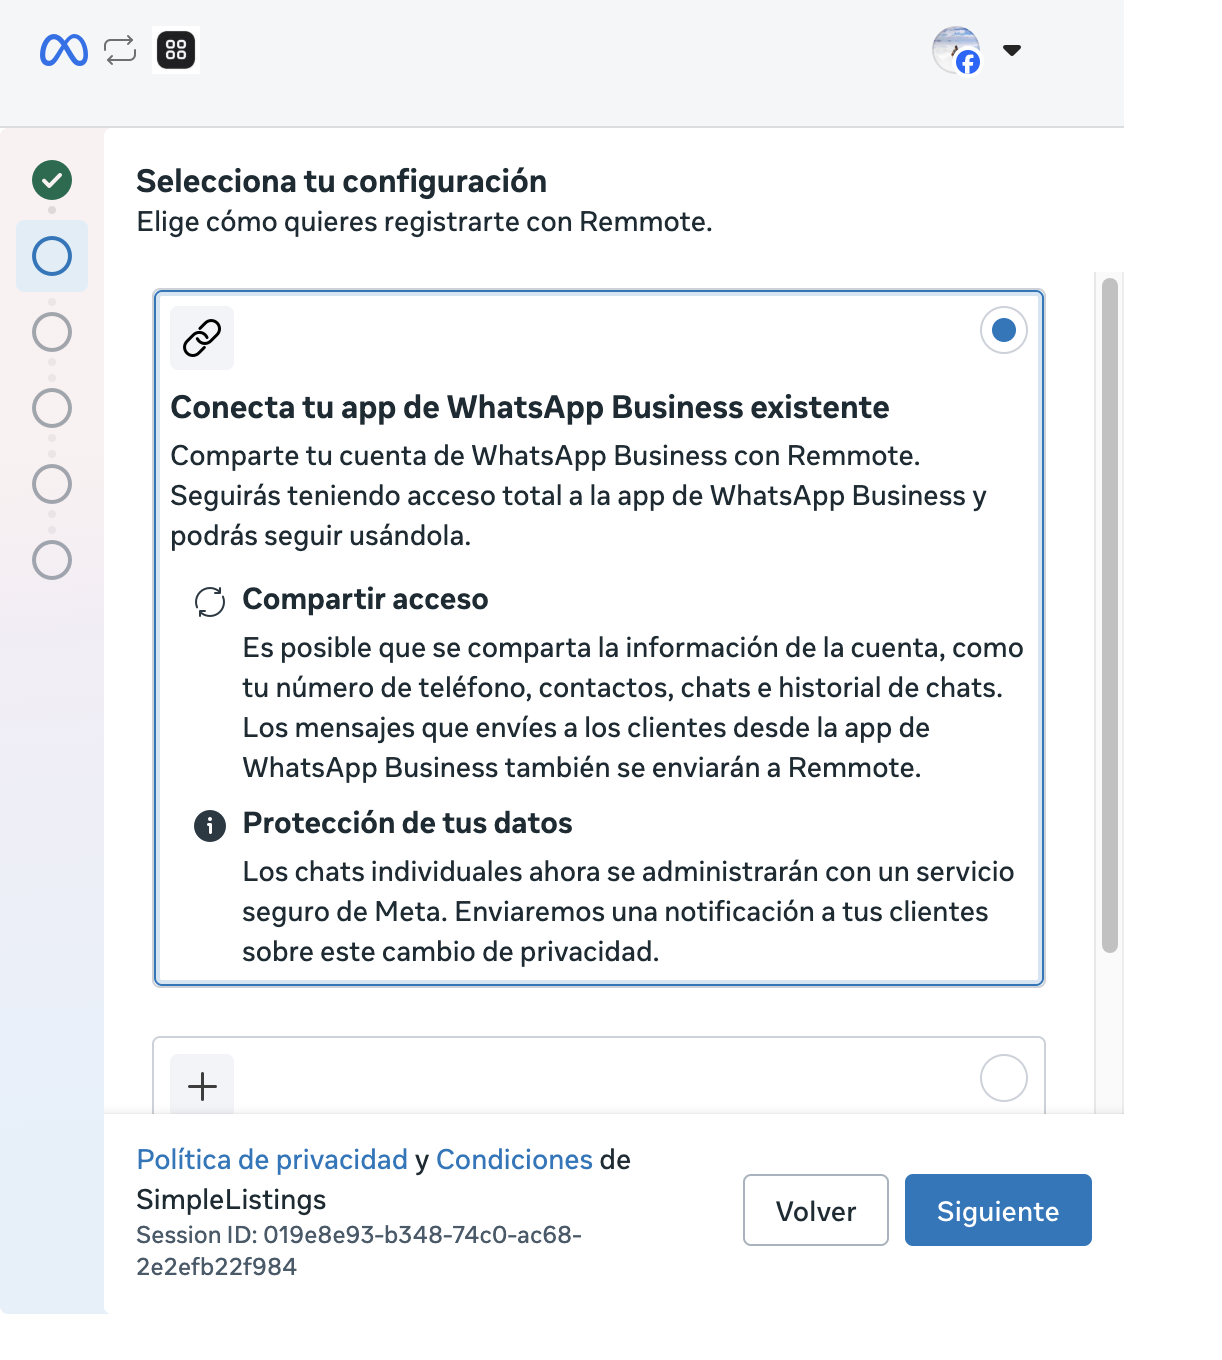
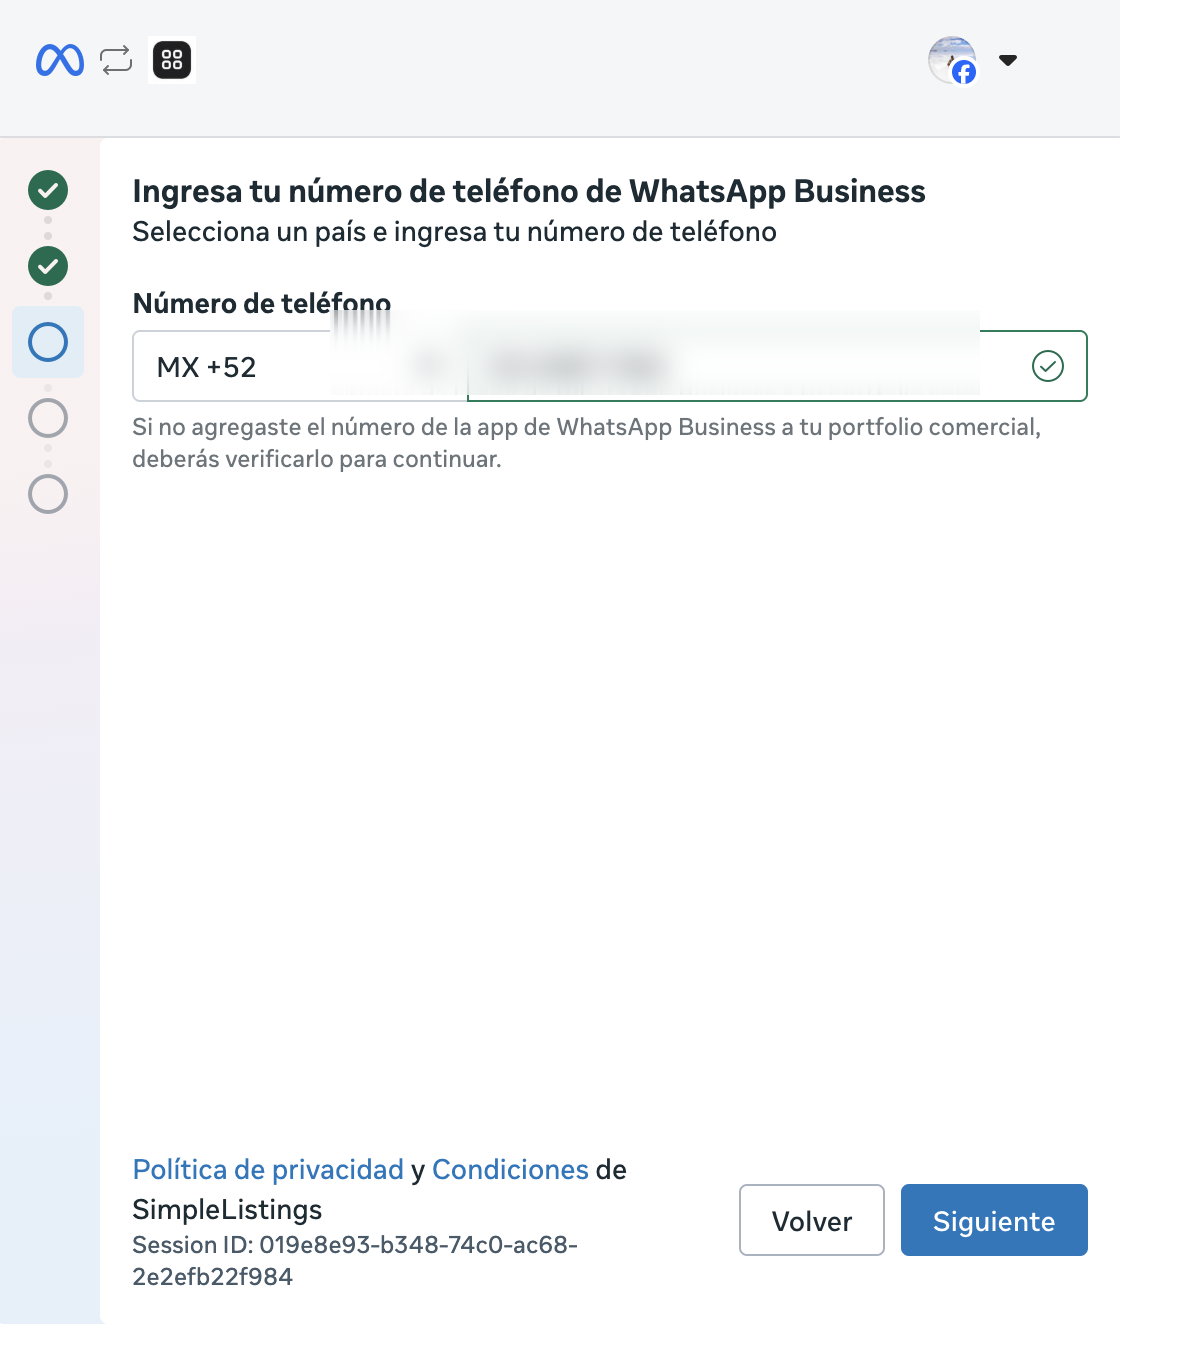
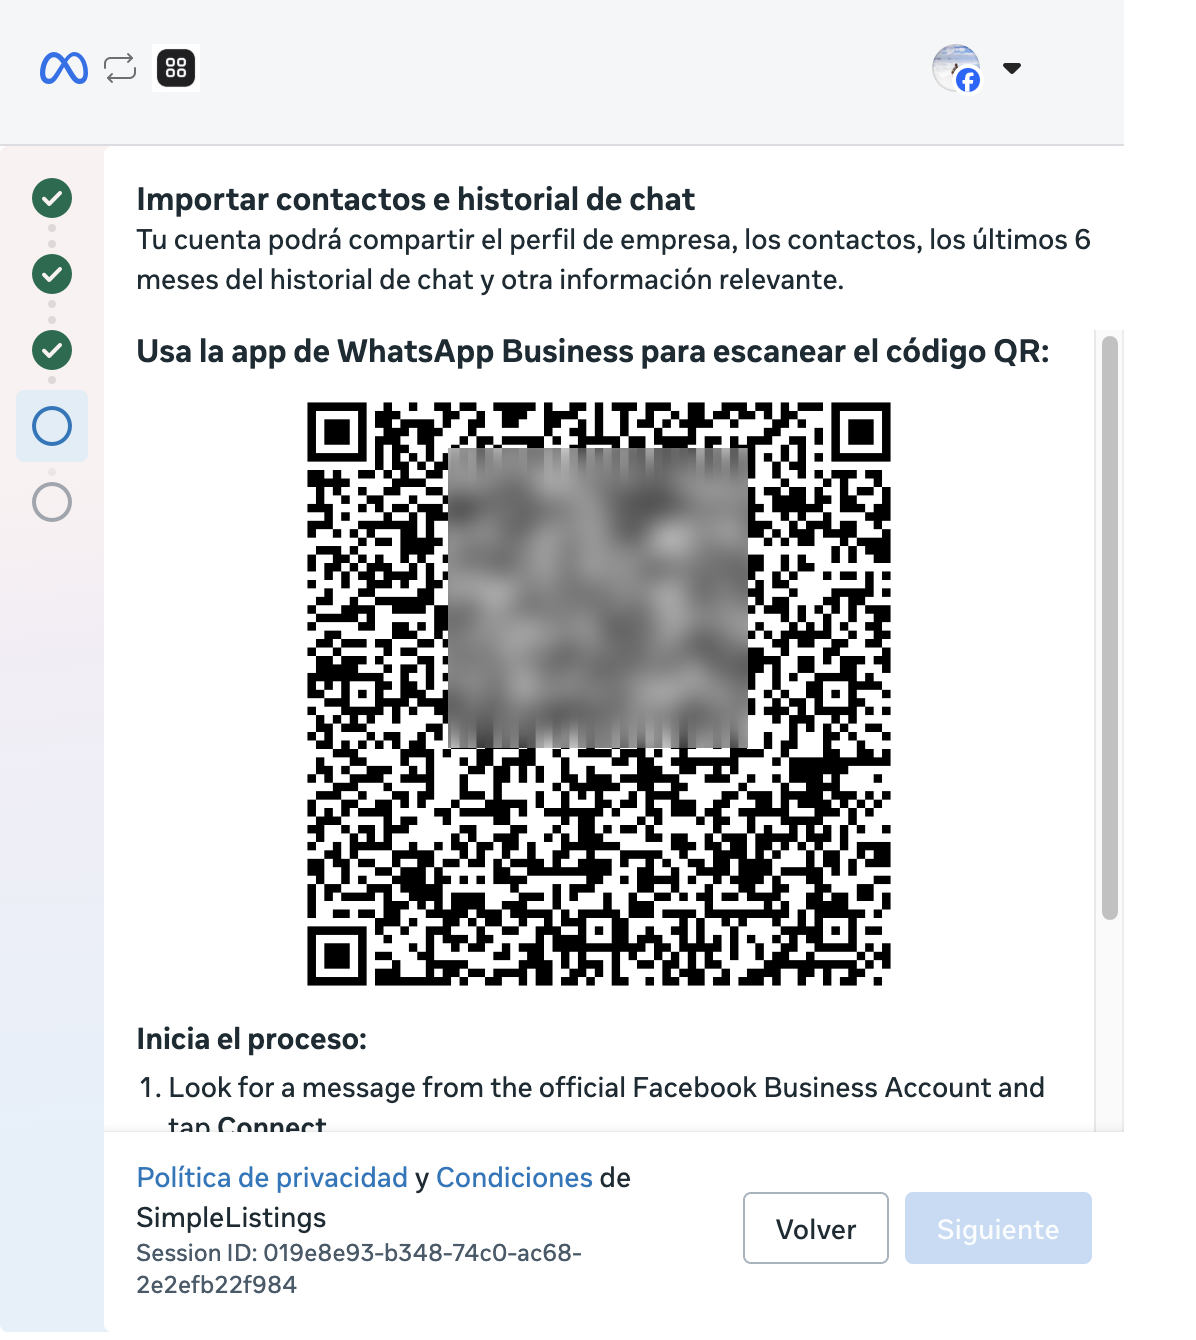
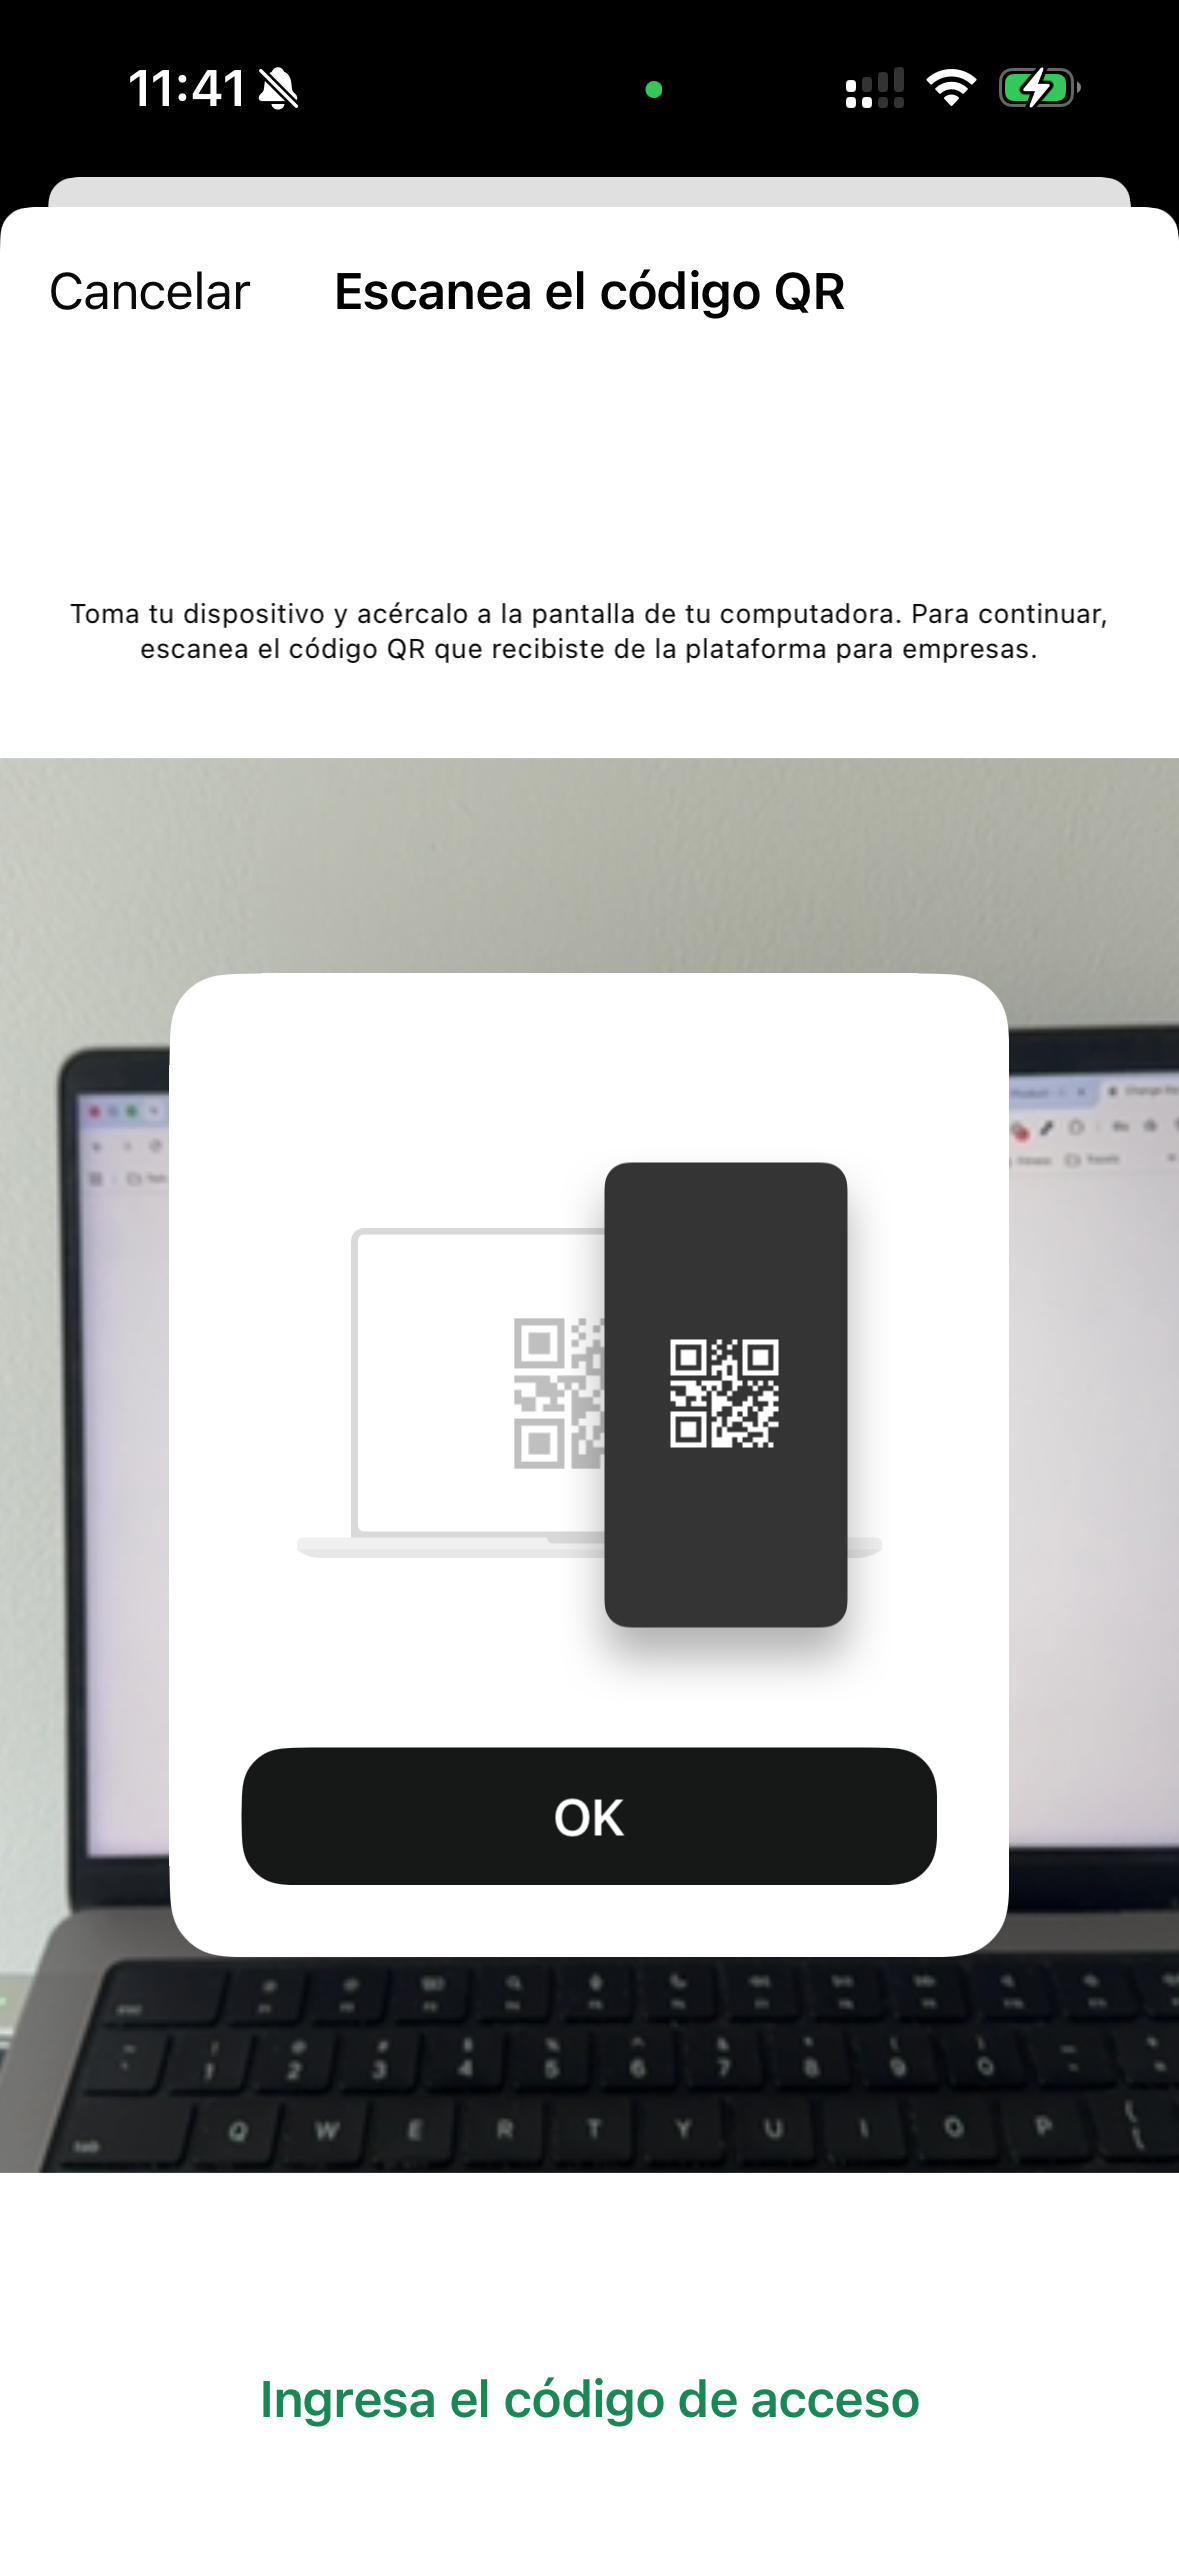
Step 3: In the Facebook window (desktop)
The actual connection happens in a secure Facebook window. Complete each screen there and use Continue in the SimpleListings guide to advance. These are the main screens:
Tip: Meta may ask for a payment method at the end. You can skip it; it is only required if you send bulk WhatsApp marketing campaigns.
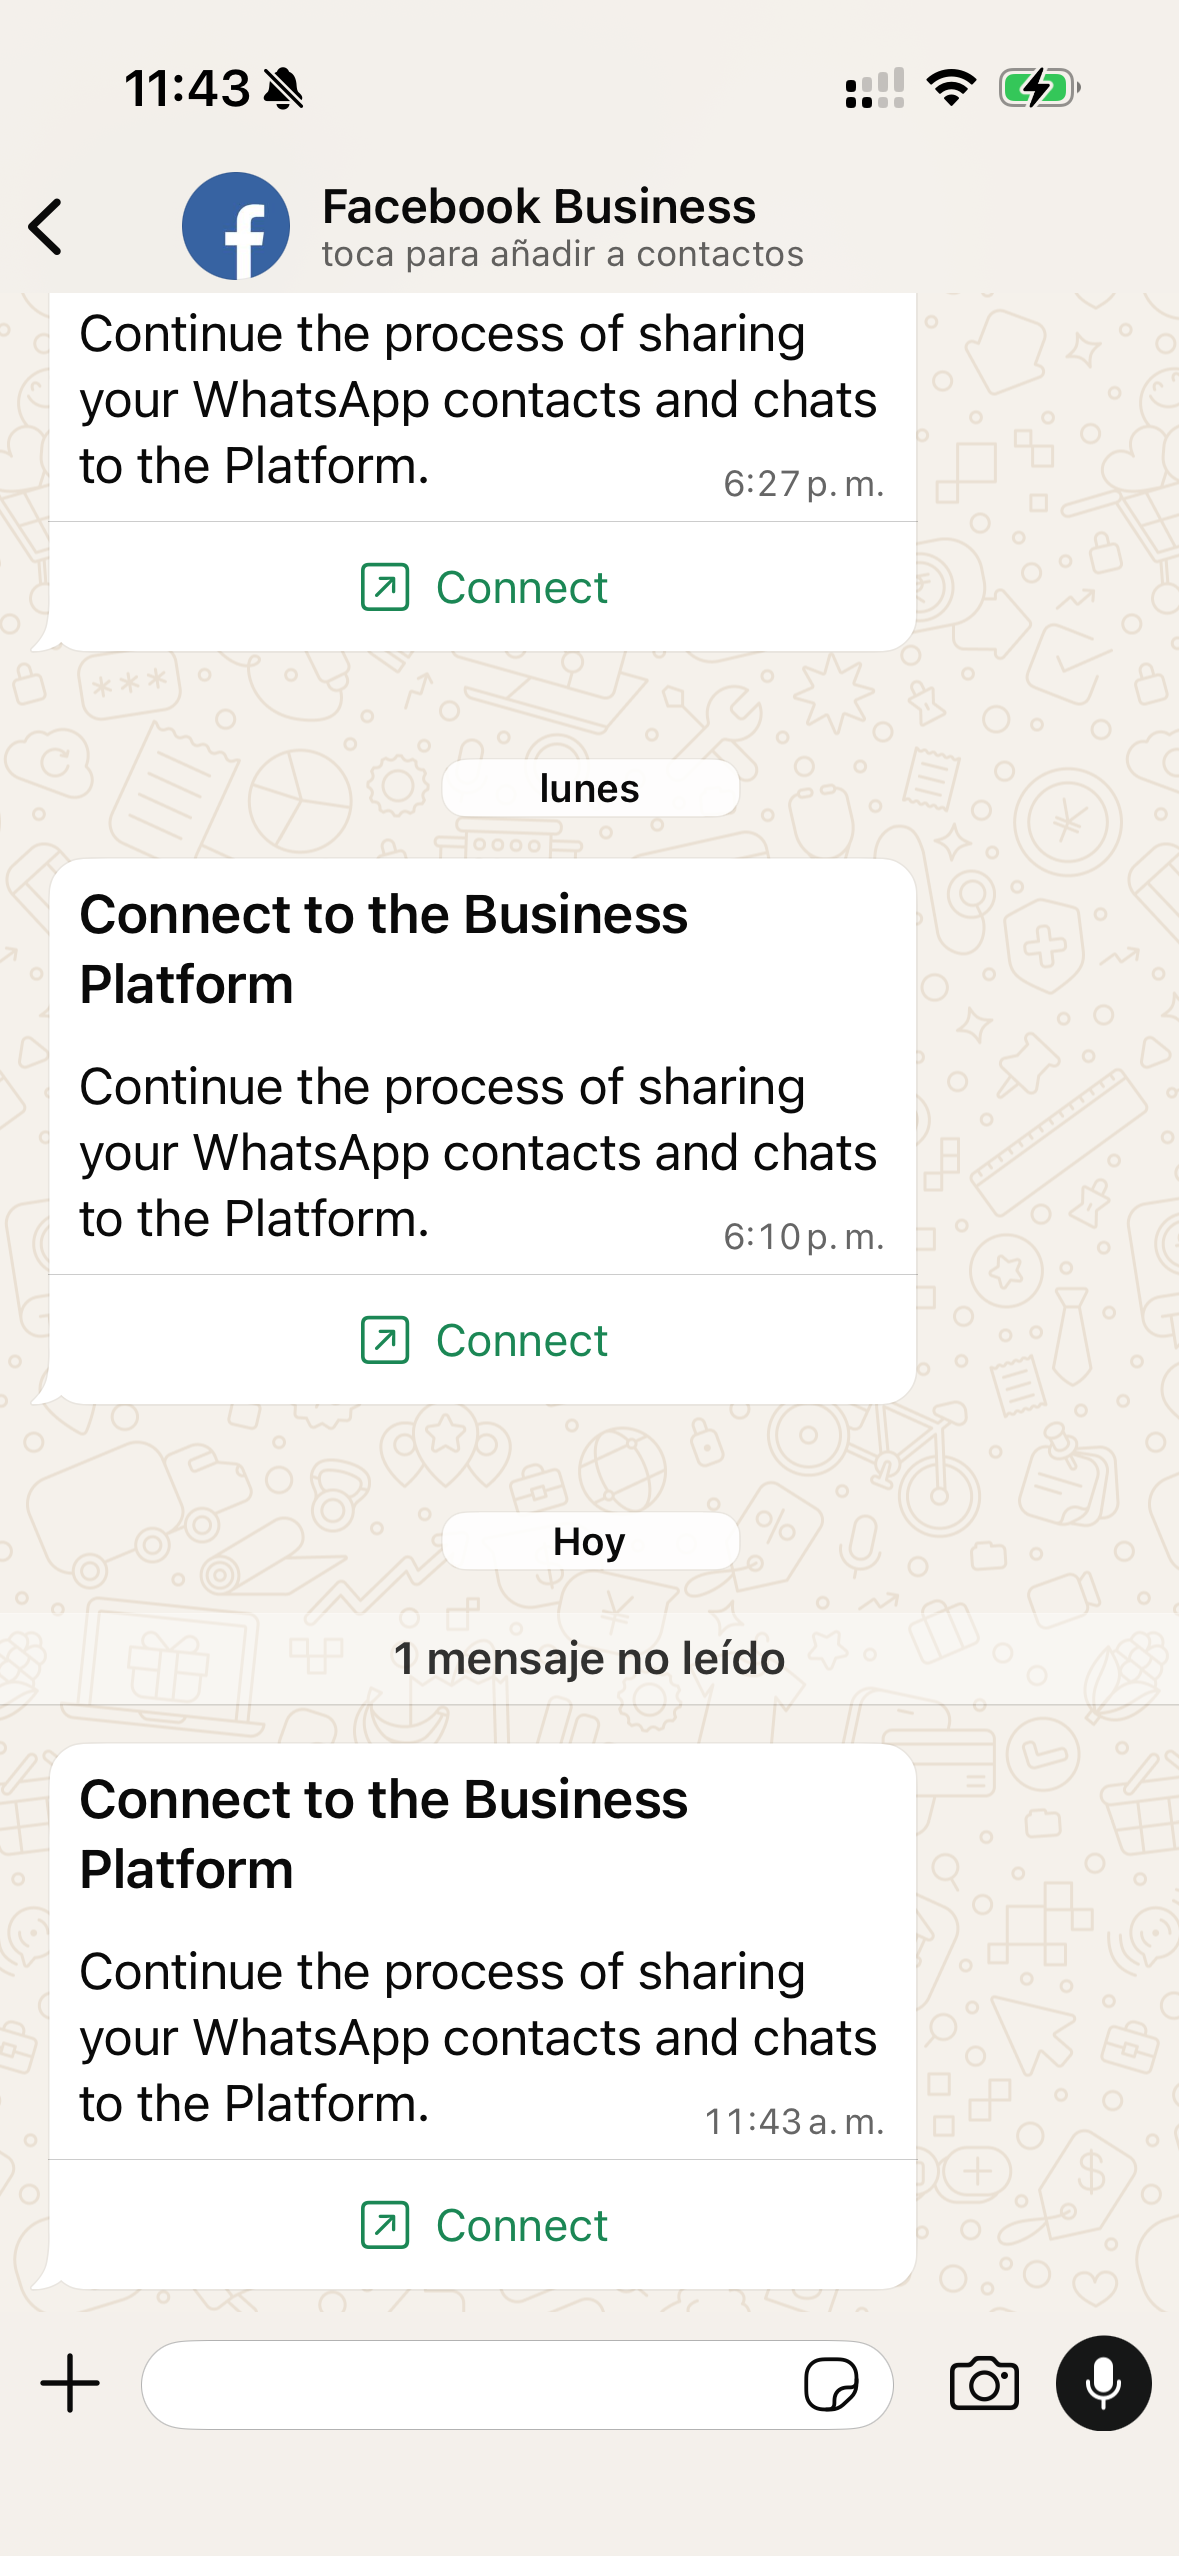
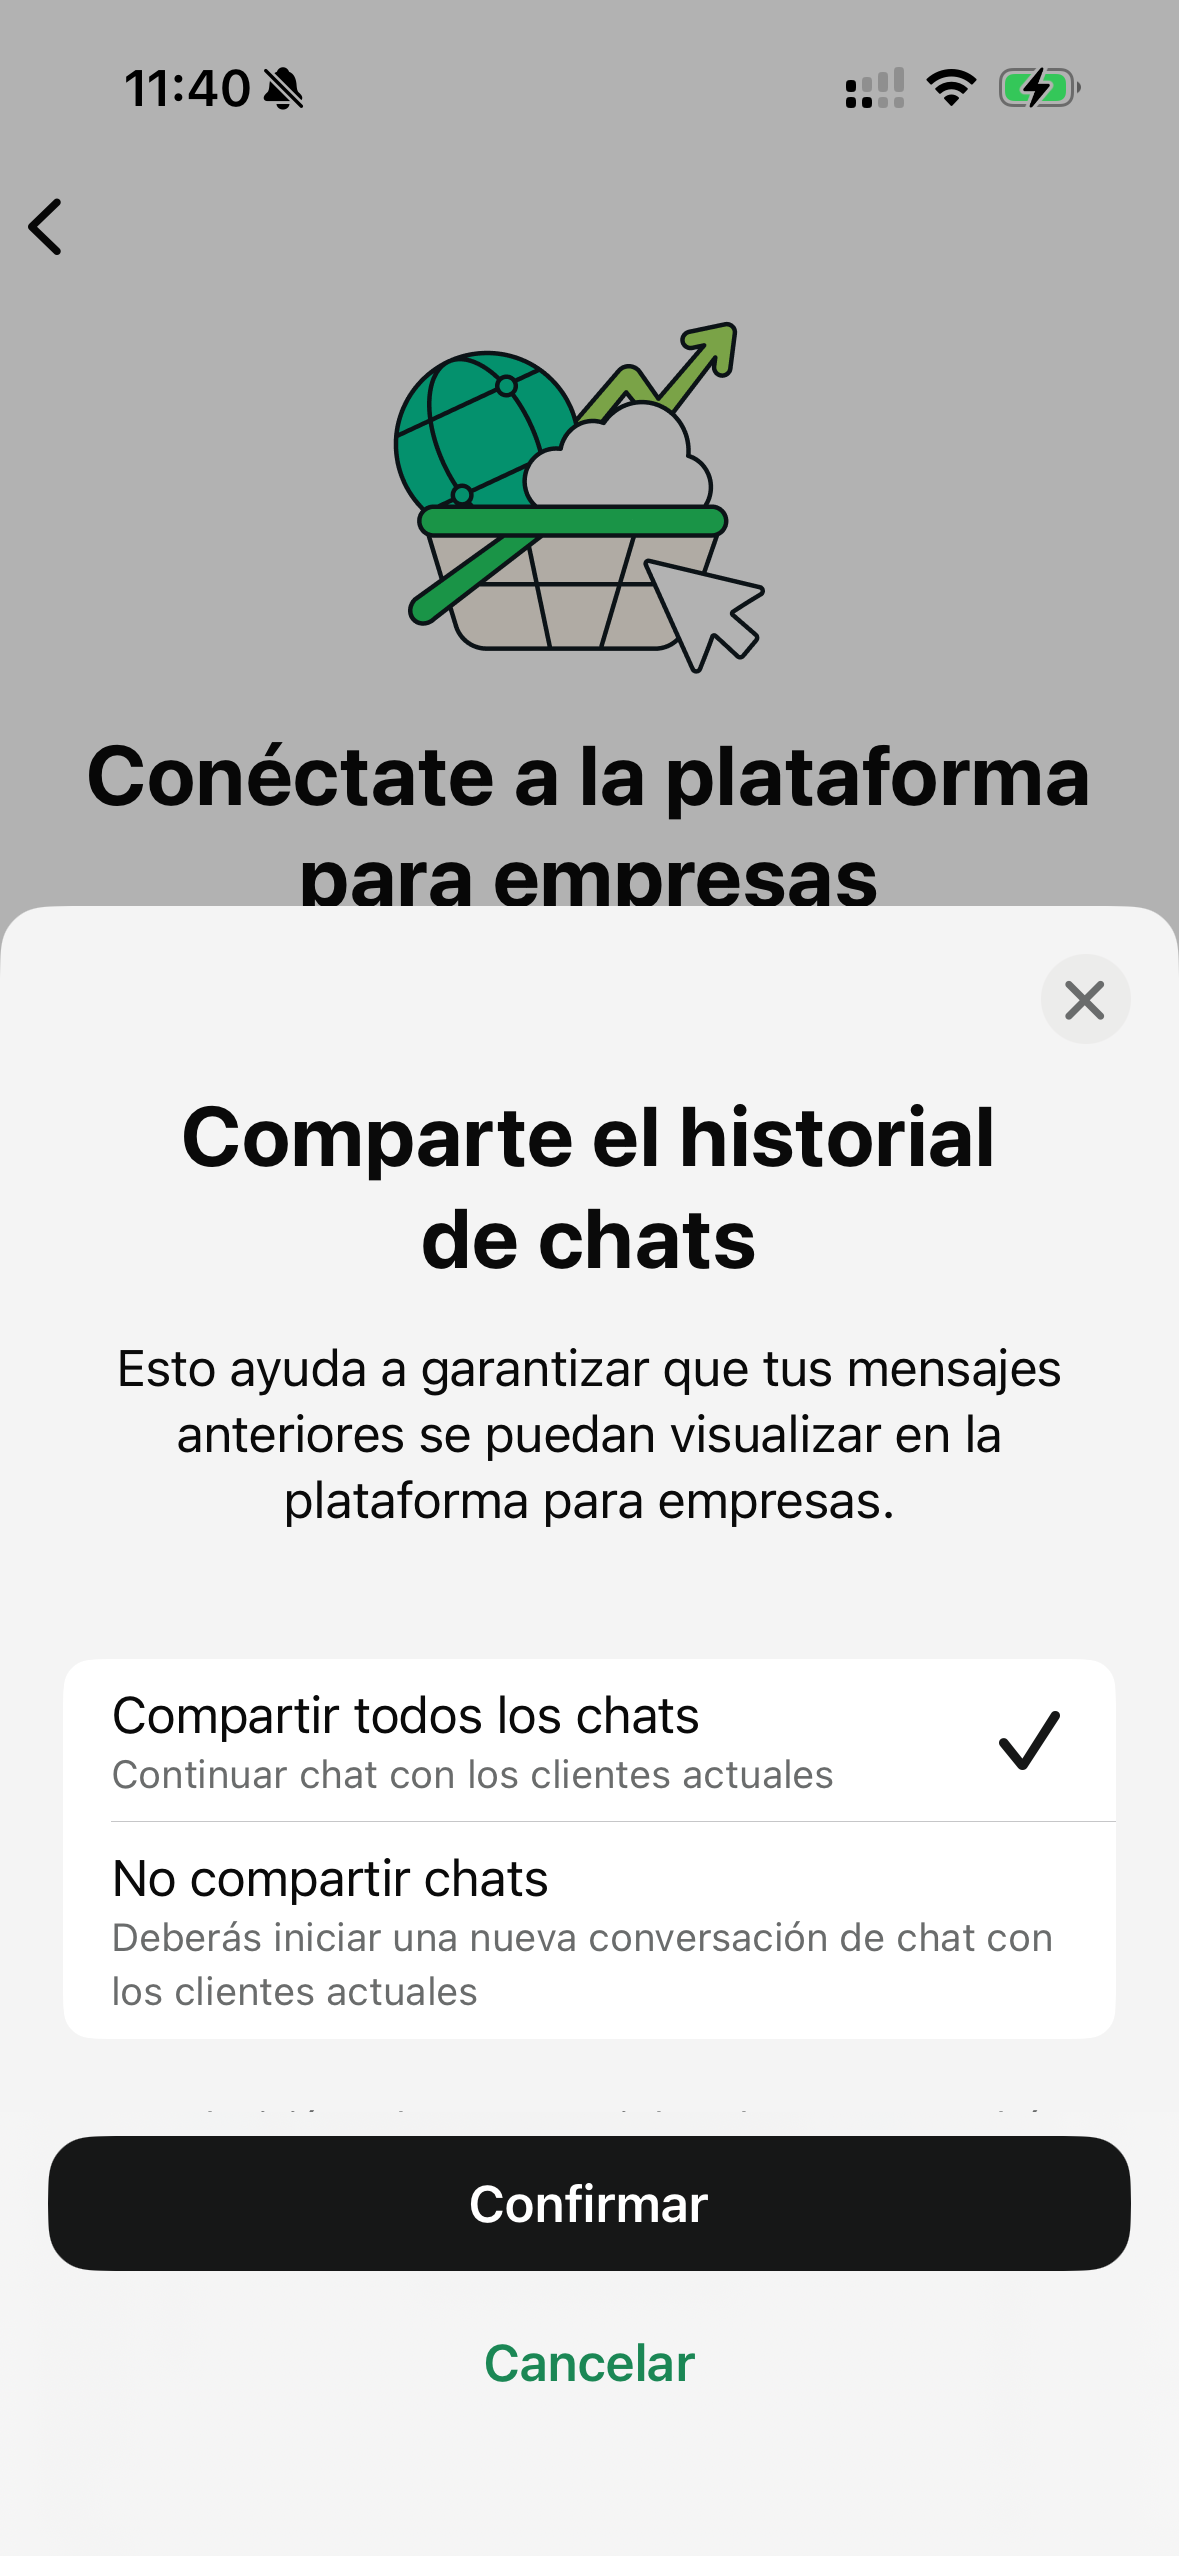
Step 4: On your phone
While the QR appears on your computer, check WhatsApp Business on your phone. Follow these steps in parallel:
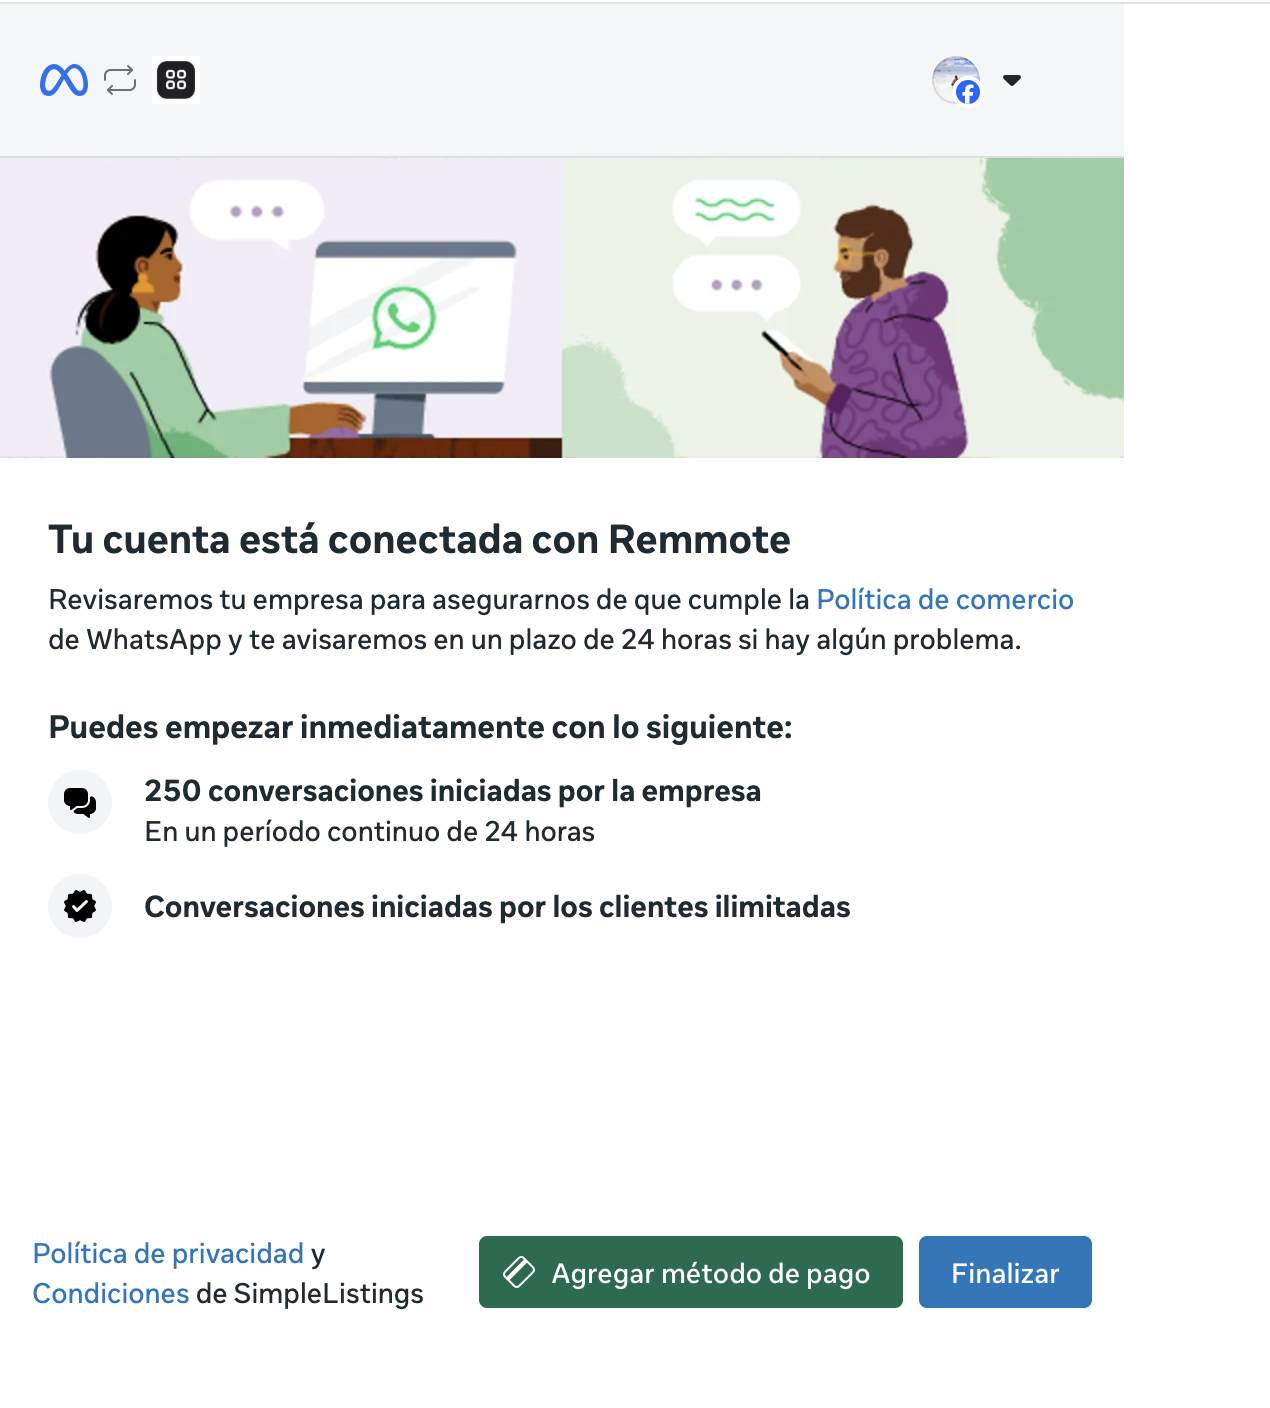
Step 5: After connecting
- Return to SimpleListings and click Refresh to verify connection
- Wait for chat history to import (may take a few minutes)
- Review your conversations in Messages
- In Integrations, confirm that Receive conversations is enabled
AI agent (optional, Advanced plan)
If you have the Advanced plan, you can configure the assistant to reply automatically with data from your catalog. Go to AI Agent in the menu and set tone, business notes, and welcome message.
Read more in our update: AI WhatsApp agent for real estate →
Turn off duplicate auto-replies
If you use the built-in WhatsApp Business greeting or away message, disable it in the phone app (Settings → Business tools → Greeting message). Otherwise the client may receive two automatic replies.